Restoring a Backyard Playset
 Sometimes you just get lucky! That’s what happened when my brother and I stumbled upon this old backyard playset for FREE! Sure it needs a little TLC, but that’s not a problem. In this article I’m going to show you the steps of restoring a backyard playset so it’s as good as new!
This project contains a paid product integration from Thompson’s WaterSeal. All opinions herein are my own. Visit my disclosure page for more information on affiliate and compensation this site accepts.
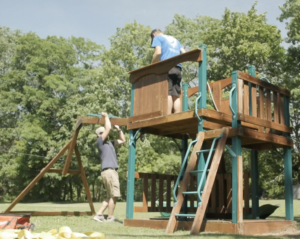
While I was home in New York a few weeks ago, my brother got a lead on a free playset from a few friends. Their kids have long outgrown it. They were planning to toss it so we offered to come pick it up and haul it away. Apart from it being pretty weathered, all the major components were still intact. So we hitched up the trailer and hauled it back to my brother’s house.
Assembling the Playset

After about 45 minutes of assembly (and some heavy lifting), the playset was back together and we got a good sense of how much work it needed to be restored. Fortunately, apart from the wood being really weathered and the finish needing to be replaced, it was in decent shape. Nothing major was missing and they had the original roof panels too!
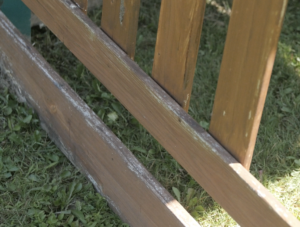
 The wood frame of the playset hasn’t been sealed or kept up with for quite a few years so it was pretty clear it was in need of a good sealant. The wood was weathered through and the finish had been completely worn off in some spots. Fortunately there weren’t any major areas of rot or cracking that needed to be replaced.
Sealing & Restoring the Playset
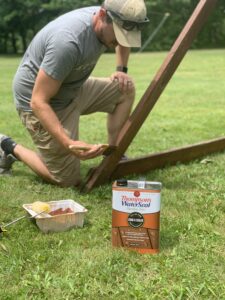
 We wanted to stain the playset so it looked pretty close to the original finish. We found the Autumn Brown Semi-Transparent Stain and Sealer at Lowe’s and thought it’d be a perfect fit for this project. The first thing I did was go around the playset and used a putty knife to just knock off any old flaking finish and scraped off any dirt that had accumulated on it.
 From there, my brother and I tag teamed the whole playset making sure to cover every inch with the new stain and sealant. We used a combination of a brush and a roller to cover the whole thing.
Another great feature of the stain & sealant we chose is that it is a single coat application. No need to go over it a second time which saves a lot of time. The stain & sealer went on simple and smooth. It covered the discolored areas easily and completely blended it to make it look like a seamless finish. It provides ultimate protection from water and sun damage, giving it long-lasting, durable protection.
We used about half of the gallon container to finish the whole playset. Cleaning up was super easy with just some warm water because it’s a water based product.
Finished Product
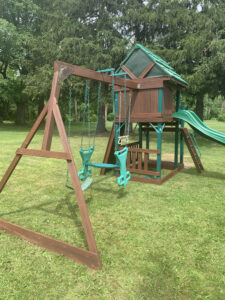
 We were super happy with how the playset came back to life. Restoring a backyard playset like this is a super easy project. You’d never know it wasn’t new by looking at it! For less than $50 and a couple hours of work, we were able to give the kids an awesome new place to play. The kids absolutely loved it!
I would call this project a serious score! Now if only every project was this easy!
If you liked this project, here are a few other lawn & garden projects and tutorials you might enjoy.
And Click here for more Thompson’s WaterSeal project ideas and inspiration.


